
This article walks through creating an Opportunity in Teammeter, filling in the requirements, and publishing it on the Opportunity board so employees can apply.
If you want to first understand what Opportunity Management is, read What is Opportunity Management? first.
Who can create an Opportunity
Three roles can create Opportunities. The creator automatically becomes an Opportunity Owner.
- Team Coaches can create Opportunities for their own Team.
- Unit Coaches can create Opportunities for their own Unit.
- HR Managers can create Opportunities for any Team, Unit, or for the whole company.
An Opportunity always has at least one Owner. Additional Owners can be added or removed later, as long as one Owner remains.
Open a new Opportunity
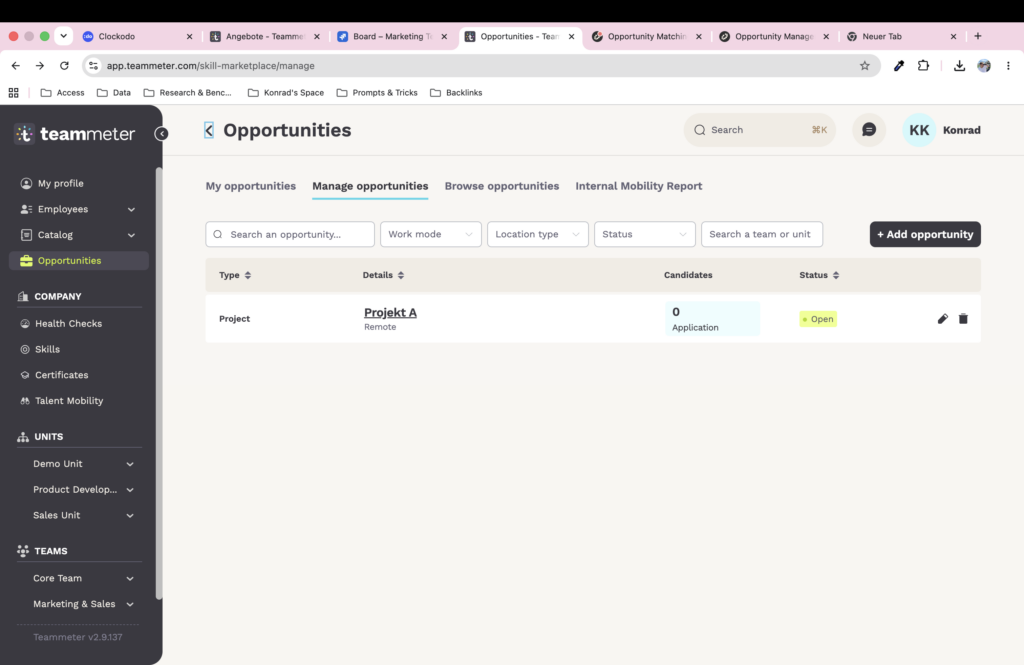
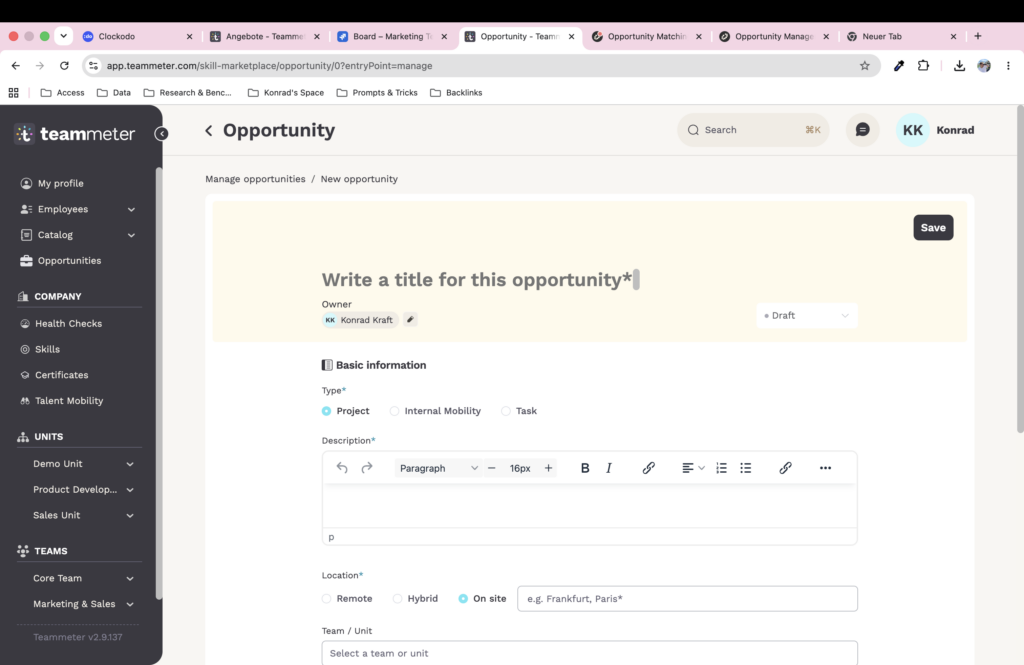
Open Opportunities in the sidebar, switch to the Manage Opportunities tab, and click + Add Opportunity. The form opens with the status Draft, which means the Opportunity is not visible to any employee yet.
Fill in the basic information
Title. The short name employees see on the Opportunity board. Keep it specific.
Type. Choose one of:
- Project for defined work with a start and end date.
- Internal Mobility for a permanent role change.
- Task for a smaller, time-boxed assignment.
The type sets expectations for everyone reading the listing and is the primary filter on the board.
Description. A free-text field for context: goals, deliverables, team setup, anything that helps a candidate decide if the role fits. The editor supports paragraphs, bold, italic, lists, and links.
Location. Pick one of Remote, Hybrid, or Onsite. If you pick Onsite, you specify the city.
Team / Organisation. The Team or Unit hosting the Opportunity. This is the context the listing is published under, and the dimension used in the Internal Mobility Report.
Define what you need
This is where you describe the candidate profile that should match. The matching engine uses these inputs to calculate a score per employee.
Role. The role you expect the candidate to bring. The role can be mandatory or optional. If mandatory and the candidate does not hold it, the entire match score for that candidate is zero. If optional, candidates without the role still appear in the list but score zero on the role criterion.
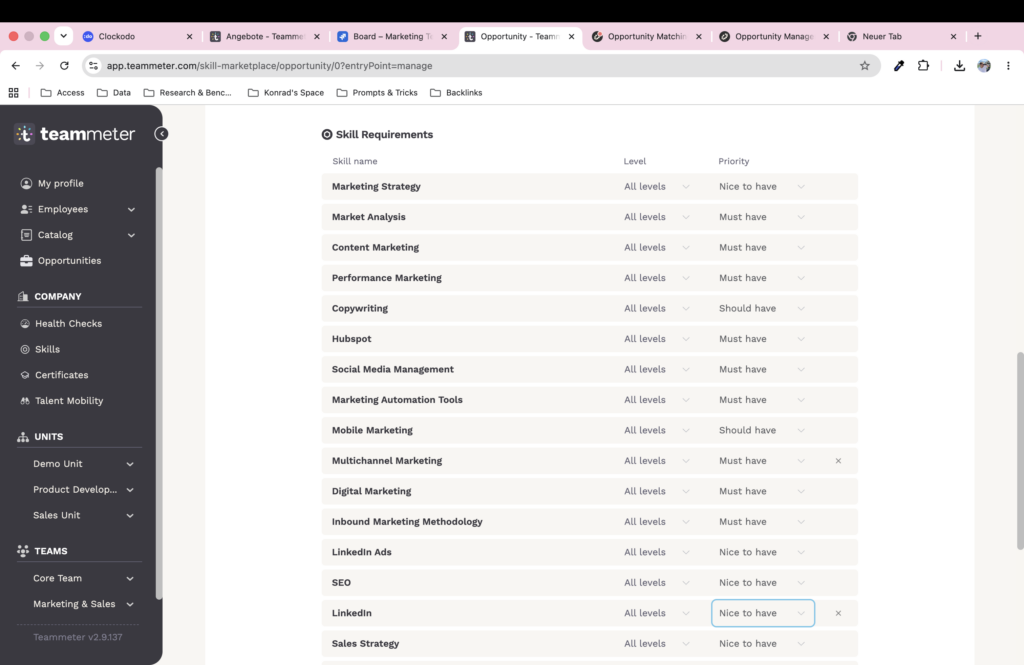
Skills. Add one or more skills from your Skill Catalog. For each skill, set:
- The required level, typically on the default 0 to 5 scale (0 No Knowledge, 1 Fundamental Awareness, 2 Novice, 3 Intermediate, 4 Advanced, 5 Expert). Scales are configurable in the Skill Catalog, including custom scales such as A1 to C2 for languages. Pick All Levels if you want the level ignored in matching for this skill.
- The weight: Nice to have, Important, or Essential. Essential carries ten times the weight of Nice to have, Important carries three times.
For the full Skill Catalog setup, see Manage the Skill Catalog.
Certificates. Add one or more certificates the candidate should hold. Each certificate can be marked mandatory or optional. A valid certificate scores full points; a missing or expired one scores zero.
For the full method by which these inputs become a match score, see How opportunity matching works.
Add time details
This section is grouped under Time scheduling and capacity.
- Start date. When the work is expected to begin. Optional.
- End date. When the work is expected to close. Used for Projects. Optional.
- Time effort. Choose Full-time or Part-time. If Part-time, also specify hours per week.
- Publication date. The date on which the Opportunity becomes visible to employees on the board. Optional.
Save as Draft or publish
A new Opportunity starts in Draft. You can save at any time and continue editing later. Draft Opportunities are visible only to the Owner and to HR Managers; no one else.
When the listing is ready, change the status from Draft to Open. The Opportunity is now published. It appears on the Opportunity board for every employee, in personalized recommendations for matching employees, and in the Owner’s match list.
After publishing
You can keep editing the Opportunity at any time.
To pause an Opportunity without closing it, set the status back to Draft. It disappears from the board until you reopen it.
To close an Opportunity (for example because the project was canceled), set the status to Closed. All open applications are automatically moved to Rejected. The record stays in the system for the Internal Mobility Report.
To mark an Opportunity as filled internally, set the status to Filled. The selected candidate is recorded, and all other applications are automatically moved to Rejected, with the option to notify applicants.
For the application side of the workflow, see Review applications and Invite candidates to an Opportunity.